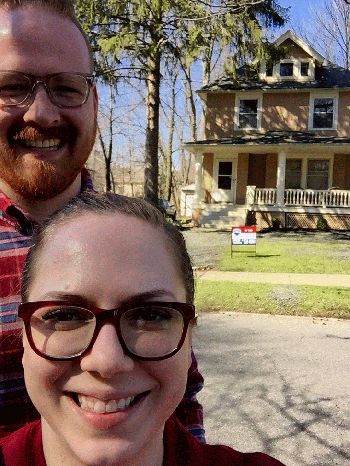
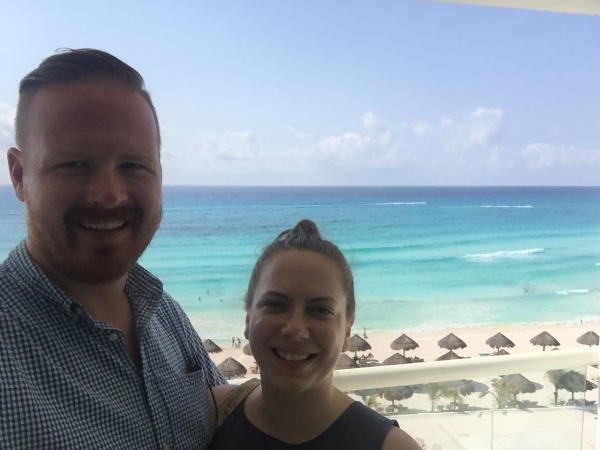
As a gradation/Match gift in April, my mom and stepdad took Daniel and me to Cancun for a week! It was the first time any of us had been on a classic tropical beach vacation and we loved it!
We stayed in the hotel zone in Cancun, at a hotel with a beautiful white sand beach. Although it was a little noisy at night, it was a great location. We rode the city bus everywhere and found Cancun very easy to navigate. We didn’t get around to exploring much outside the city, but that just means we will have to return to see the rest of the Riviera Maya!
Some highlights from the trip:
The hotel
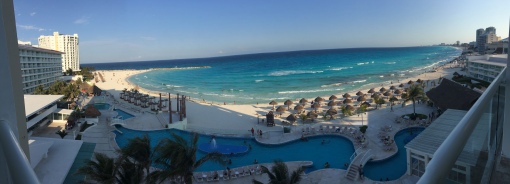
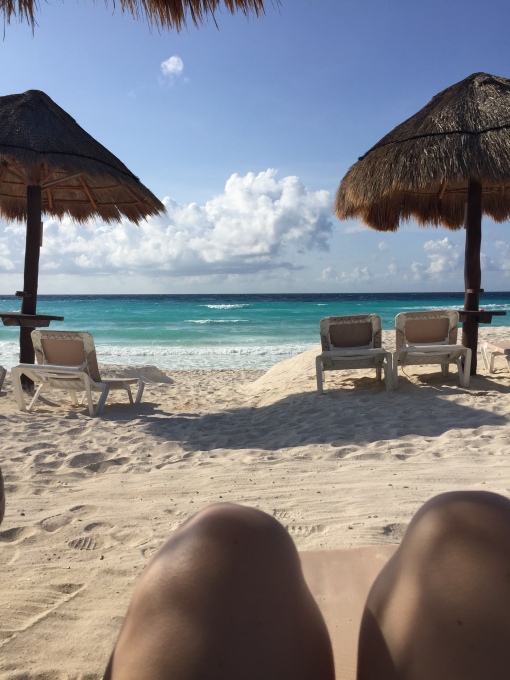
Since the hotel had such a pretty beach, we spent the majority of our time just laying out under the palapas (thatched beach umbrellas) in the chaise lounges. The perfect place to read a book, drink a beer, and work on getting a little bit tan.

My bikini is Gabifresh for Swim Sexy. Workin’ that fatkini!
We got our sunscreen and a styrofoam cooler filled with beer, and stayed out all morning most days. We did spend a little time in the water, but on the first day the waves knocked off my red heart sunglasses and they were gone forever.
 Yeah, it’s like this every day.
Isla Mujeres
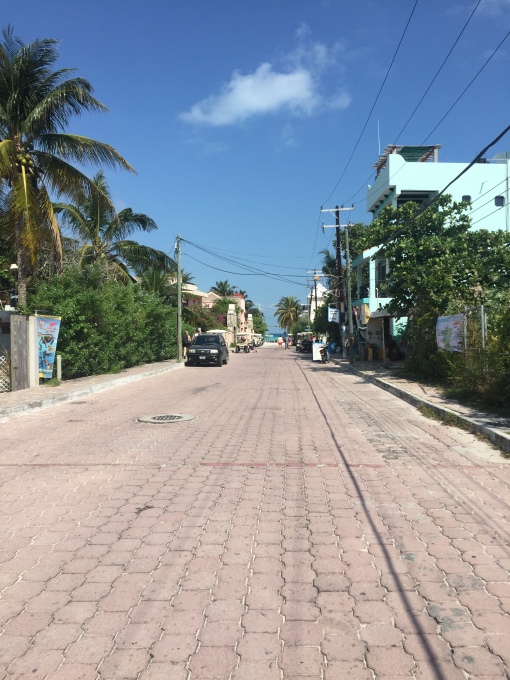
This little island just off the coast of the Yucatan is a 30-minute ferry ride from Cancun. We visited twice during our week in Mexico. The best part about La Isla was renting a golf cart and driving around the island (it’s really that small!)

Playa Norte, the beach at the north end of the island, is amazing, with the calmest blue waters we experienced on our trip. No photos of the playa because we were out swimming the whole time! We chose to rent an umbrella and beach chairs (about $15 for three of us for the day).
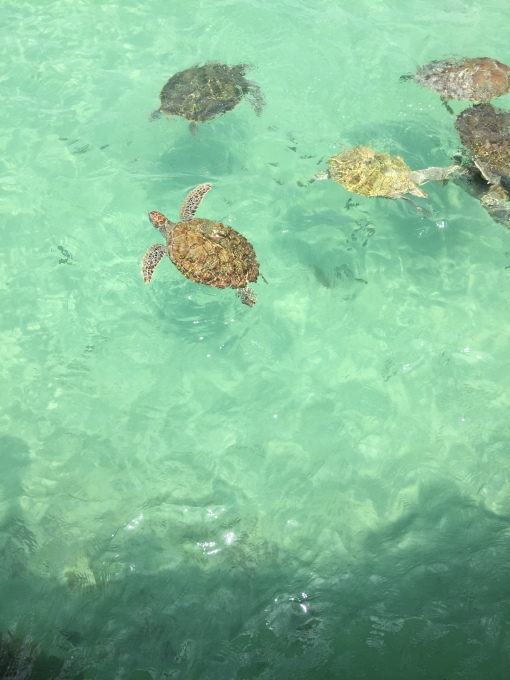
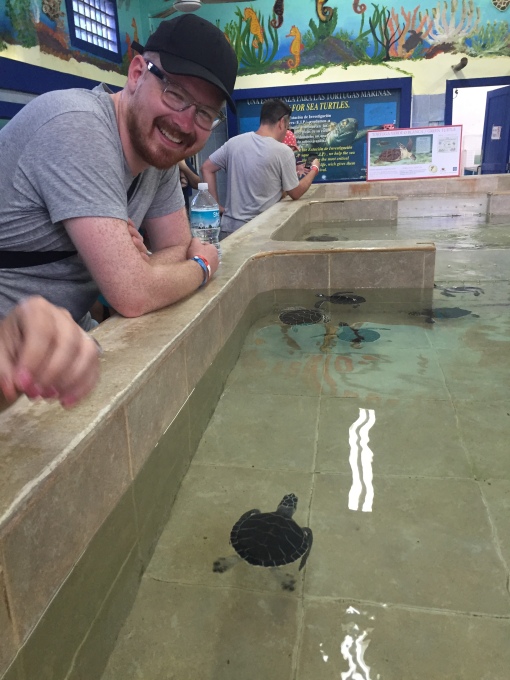
We visited a turtle sanctuary/farm on the island called Tortugranja. Admission was 30 pesos and a bag of turtle kibble was 10 pesos. It was so fun to feed the beautiful, feisty little turtles!
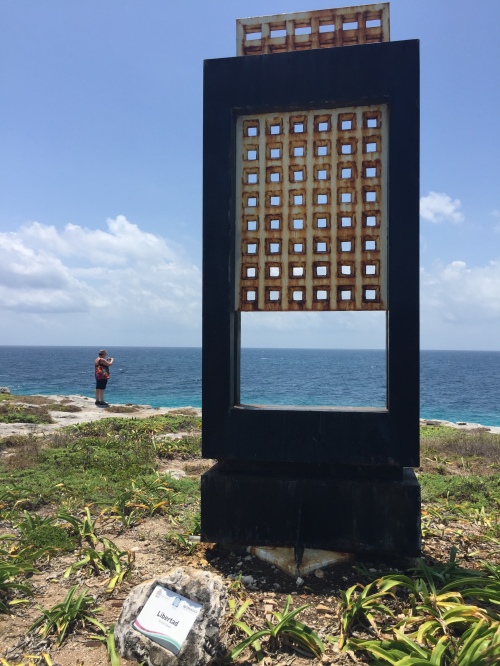
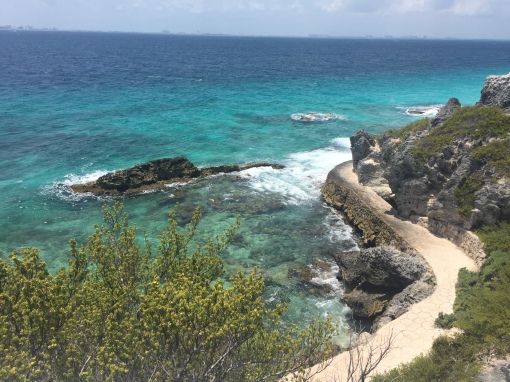
There was so much beauty on our trip, but I think our favorite spot was at the very southern tip of La Isla. This rocky spot is home to Mayan temple ruins as well as a modern sculpture garden. It is also the easternmost point in Mexico, the first place where the sun hits Mexico in the morning. It was rocky and wild and just beautiful.
 We ended one of our days on La Isla with a lobster dinner at sunset on the beach.

Cancun
We also had a lot of fun exploring Cancun using the bus system. The buses are fabulous – they cost 10.5 pesos (less than $1) and they run constantly. We never waited more than 3-5 minutes for a bus, usually less. They would also pick you up even if you weren’t at an official bus stop! During our whole week, we only took a cab once, because we were running late for a dinner reservation.
Some of the places we visited and plan to return to (sorry, there aren’t pictures for everything):
- Spa Xbalamque – We visited the spa twice and were well-attended to both times. The space is clean, the staff are attentive (little or no English spoken here, btw), and the prices are cheap. Like, ridiculously cheap. On our first day, we each had 4 hours worth of services for about $100 USD per person (before tip). It was absolutely fabulous.
- La Habichuela Sunset – An amazing old-school resturaunt with great food, incredible ambiance, and spectacular entertainment. During our 2 hour dinner, we saw an hour-long Mayan show, and were serenaded by two different mariachi bands. The restaurant is gorgeous, with a beautiful garden courtyard dining room. Unfortunately, I was suffering from a little bit of food poisoning + sunburn that night, so I can’t personally vouch for the food, but my dining companions said it was delicious and worth returning.
- La Casa del Habano – This is a cigar shop in the hotel zone. I don’t smoke – not even a little – but my stepdad loved this place. They also have a bar and a deck overlooking the lagoon, where I enjoyed the best mojito of my life.
- Peter’s Restaurant – This little restaurant is not in the hotel zone, doesn’t have a view, and is tucked away off of a noisy busy street. But we ate dinner here twice and would return again in a heartbeat. Peter’s is a family-run place serving European-Mexican fusion (the owner and chef Peter is Dutch). The food was wonderful, the service was fabulous, and it felt so welcoming. What a cool place.
- Thai Cancun – We went to this restaurant on our first night and honestly, we’re not sure if we would return. On the one hand, the location is amazing – tables are situated in their own little private cabanas out on the lagoon. There are red lanterns everywhere lighting up the water. It is so cool-looking. But the Thai food was fairly bad, and to make it worse, this was definitely the most expensive meal we had during the whole trip. Still, it might be worth a return visit at sunset though – maybe just for drinks and appetizers?

- Parque de las Palapas – I highly recommend venturing into Cancun proper, if only for an afternoon. Since we were already headed into the city center to get to the spa, we also dropped by El Parque de las Palapas (Park of the Umbrellas). This public square is nearly deserted during the day, but after 5pm, it comes alive with dozens of vendors and hundreds of people – mostly local families with children. This was my chance to enjoy all my favorite street foods, from sopes to elotes to churros. Daniel and Mom got themselves some giant chamoyadas, but I passed. I highly recommend visiting for a chill, low-key dinner and some great people-watching.


One thing is for sure – all four of us definitely plan to return to the Riviera Maya – and soon! I am currently in the process of securing my vacation time for next year. Once Daniel knows his spring break schedule, we may just have to start planning our triumphant return!
Thanks, Mom and Steve for the best vacation ever, and for being great travel companions! We love you!
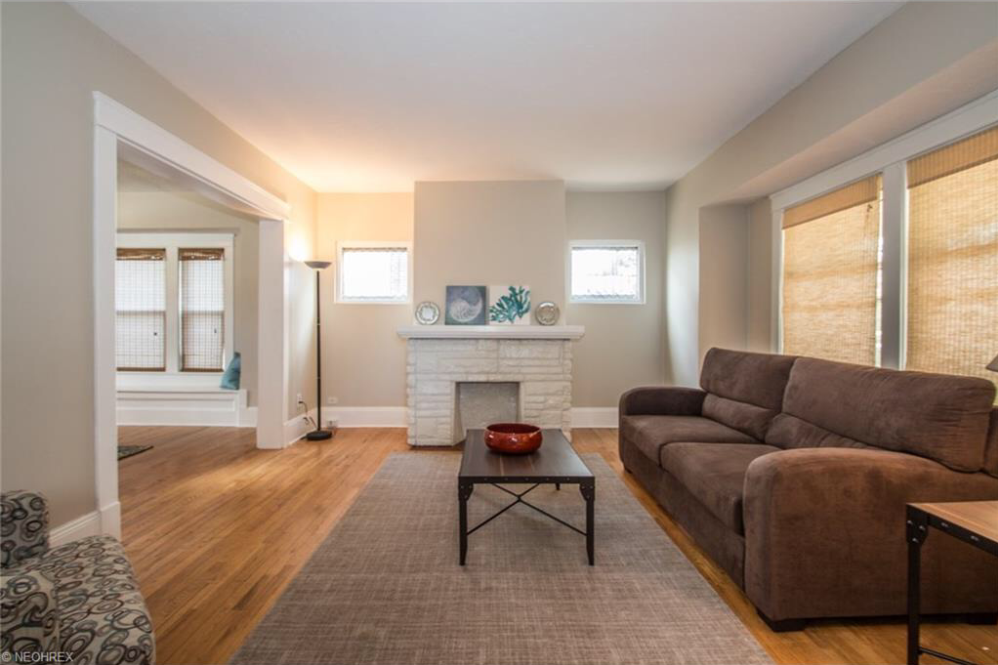
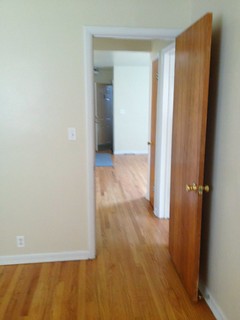
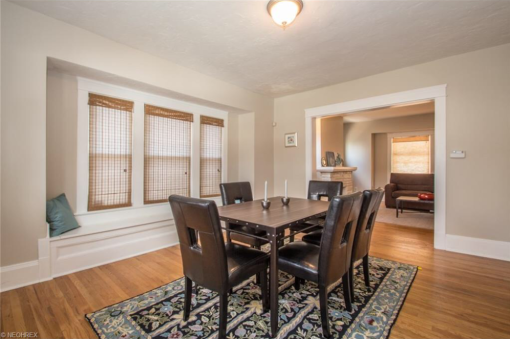 I love the window seat in the dining room. The seat lifts up to reveal storage underneath!
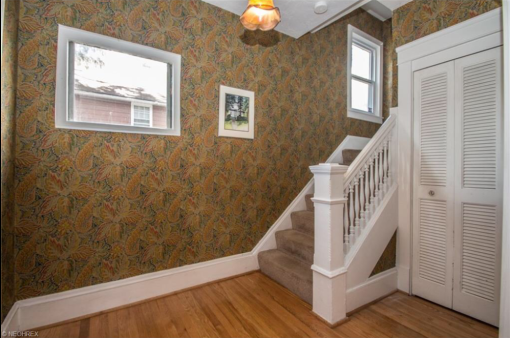 The foyer has some wacky wallpaper going on, but its not too bad and again, I think I can live with it for a little while. It does add some nice color and it’s in pretty good condition.
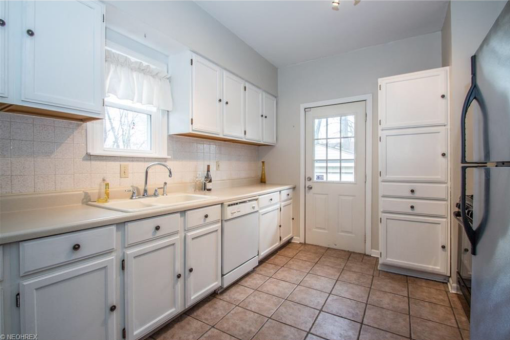 We were actually really happy to find the kitchen in this condition. While none of the components appears to be original to the house, the cabinets and sink are still fairly old, probably from the 60s. When we were house-hunting, we saw way too many houses that people were trying to flip, and they all had kitchens that were, frankly, disappointing. We are not really interested in the ubiquitous granite/brushed nickel fixtures/stainless steel appliances look that is the new “builder basic” these days. And we certainly didn’t want a cheap “flipper” version of it.
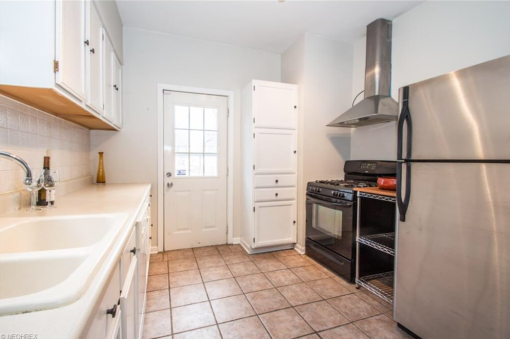 So we like the old oak cabinets, which are sturdy and simple. We can work with the galley kitchen layout which, while not ideal, is better than some weird “breakfast bar” layout that no one will ever use. We can definitely live with the kitchen as-is for now, and we have lots of plans for a beautiful, inexpensive remodel within the next year or so.
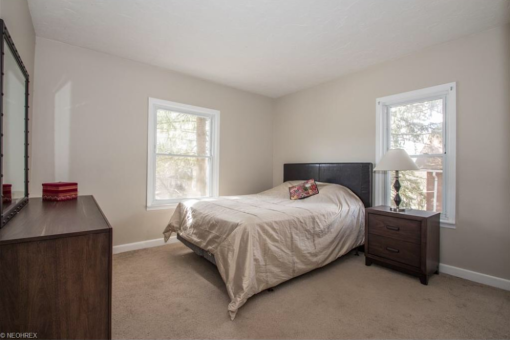 Upstairs there are 4 bedrooms and 1 bath. Unlike the first floor, it seems like things haven’t been as carefully maintained up here. The floors are ugly lumpy cheap beige carpet and there is quite a bit of slope (we have looked into it and are convinced the floor is structurally sound at least). I did peel back the carpet in several closets and it appears that the original hardwood floor is still under there! We plan to rip up all the carpet right away and get the floors refinished.
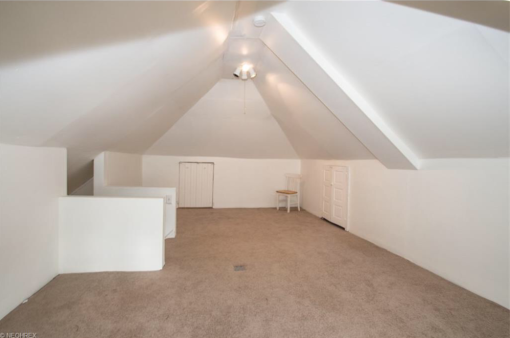 Although this space is “finished” with drywall, paint and carpet, it has no heating or cooling and therefore technically cannot be considered living space. It also doesn’t look nearly as nice up close as in photos – the intense thermal cycles that this room experiences have caused a lot of cracks and buckling.